How To Backup Nextcloud
| 12 min read
"How To Backup Nextcloud" was originally written on 03 July 2019, but has been updated on 19 June 2020.
I recently wrote a guide on how to setup your own Nextcloud server; it's a great way of ensuring your personal data is kept private. However, it's also important to backup Nextcloud too.
Isn't Nextcloud My Backup?
No it isn't. Nextcloud is not a backup solution, it's a way of syncing your data, but it's not a backup. Think about it, if you delete a file from computer A, that deletion will immediately be synced everywhere via Nextcloud. There are protections in place, such as the trash bin and version control, but Nextcloud is not a backup solution.
Since building my own server I have come up with a pretty decent way of backing up my data that follows the 3-2-1 principle of backing data up.
At least 3 copies of your data, on 2 different storage media, 1 of which needs to be off-site.
- The 3-2-1 backup rule
Requirements
In order to effectively backup Nextcloud, there are a few pieces of hardware and software involved. There is an initial cost to the hardware, but it isn't significant.
To backup Nextcloud you will need:
- An Ubuntu based server running the Nextcloud Snap
- A USB hard drive that is at least double the size of the data you're backing up (I'd recommend getting the biggest you can afford)
- Duplicati backup software installed on your Nextcloud server
- A Backblaze B2 account
- Around 30-60 minutes to set it all up
At this point I will assume that you have connected and mounted your USB hard drive to the server. If you haven't done that yet, take a look at my guide on how to mount a partition in Ubuntu.
Note: this process is designed around the Nextcloud Snap installation, not the manual installation.
Overview
Following this post, you will be able to do the following:
- Automatically backup your entire Nextcloud instance (including your database) every day
- Create a log file so you can see if the backup worked
- Sync the backup to B2 cloud storage (it will be encrypted before transmission)
- Delete old backups so your hard drive doesn't fill up
- Receive email alerts once the backup completes
User Setup
I would reccomend using a dedicated user for backing up. This will allow us to keep the backup routine separate from the normal user account you use, making the setup more secure.
In this guide, I will be using ncbackup as the user account. You can use whatever username you feel is appropriate. Let's start by creating the user and the directories we will need to store our backups.
# Create new user
sudo adduser ncbackup

# Switch to new user account
su - ncbackup

# Make directories for Backups
mkdir Backups
mkdir Backups/Logs

# Logout to switch back to normal user
logout
Now we have the directories setup, let's create the script that will run our backups. In this example, I'm using nano, but feel free to use any text editor you like. To learn more about nano, click here.
nano /usr/sbin/ncbackup.shWe're using the usr/sbin directory because it is used for system-wide binaries that require elevated privileges. You can store your script wherever you like, but usr/sbin is good practice.
Backup Nextcloud
Populate the file with the following, ensuring you change the username and path to whatever the appropriate values are for your setup.
#!/bin/bash
# Output to a logfile
exec &> /home/ncbackup/Backups/Logs/"$(date '+%Y-%m-%d').txt"
echo "Starting Nextcloud export..."

# Run a Nextcloud backup
nextcloud.export
echo "Export complete"
echo "Compressing backup..."

# Compress backed up folder
tar -zcf /home/ncbackup/Backups/"$(date '+%Y-%m-%d').tar.gz" /var/snap/nextcloud/common/backups/*
echo "Nextcloud backup successfully compressed to /home/ncbackup/Backups"

# Remove uncompressed backup data
rm -rf /var/snap/nextcloud/common/backups/*
echo "Removing backups older than 14 days..."

# Remove backups and logs older than 14 days
find /home/ncbackup/Backups -mtime +14 -type f -delete
find /home/ncbackup/Backups/Logs -mtime +14 -type f -delete
echo "Complete"

echo "Nextcloud backup completed successfully."
Now we need to make our backup script executable:
sudo chmod +x /usr/sbin/ncbackup.shA lot of the commands in our script will require sudo access, but we don’t want to give full sudo access to our ncbackup user, as it doesn’t need elevated rights globally. However, we do want to be able to run the backup script with sudo rights, and we want to do it without requiring a password.
To accomplish this, we need to use visudo. We can configure visudo to allow the ncbackup user to run the backup script as sudo, without a password. Crucially, the ncbackup user will not be able to run anything else as sudo.
# Allow ncbackup to run script as sudo
ncbackup ALL=(ALL) NOPASSWD: /usr/sbin/ncbackup.sh

# Open visudo
sudo visudo

# Allow ncbackup to run script as sudo
ncbackup ALL=(ALL) NOPASSWD: /usr/sbin/ncbackup.sh
Enabling sudo access for the backup script introduces another potential security risk. The ncbackup user can run the backup script as sudo without a password. So a threat actor could potentially edit the script and run any command as sudo without a password.
Bad times.
However, we saved the script in /usr/sbin, which means the ncbackup user will not be able to edit the ncbackup.sh script. By doing so, we have prevented the system from becoming insecure.
As an extra layer of security, we will stop the ncbackup user from being able to login to the server at all:
sudo usermod -s /sbin/nologin ncbackupIf at a later date you need to be able to login using the ncbackup user, you can revert change this by running the following command:
sudo usermod -s /bin/bash ncbackupSchedule Backups
Now have the backup script setup, we need to schedule the backup to run automatically; for this, we will use Cron.
Run the following command to enter the Cron settings for the ncbackup user:
sudo crontab -u ncbackup -eOnce you’re in crontab, you need to add the following lines to the bottom of the file:
# Nextcloud backup cron (runs as 2am daily)
0 2 * * * sudo /usr/sbin/ncbackup.sh
The settings above will run the backup script at 02:00am every day. You can change this to whatever value you like, but I would recommend running the backup every day.
The first value represents minutes, then hours, then days etc. So if you wanted to run the backup at 03:30am, your Crontab entry would look something like this:
# Nextcloud backup cron (runs as 03:30am daily)
30 3 * * * sudo /usr/sbin/ncbackup.sh
Now Wait…
That’s most of the setup complete at this point. The next thing to do is to wait 24 hours for your backup to complete automatically (or you could run the script manually yourself).
Once the script has run, you should see a tar.gz file within your backup folder with a name that corresponds to the date the backup ran:
kev@server:~$ ls /home/ncbackup/Backups/
2020-06-10.tar.gz  Logs
Within the Logs folder, you should also see a <date>.txt file that corresponds to the backup. You can open this to see how your backup went:
kev@server:~$ cat /home/ncbackup/Backups/Logs/2020-06-10.txt
Starting Nextcloud export...
WARNING: This functionality is still experimental and under
development, use at your own risk. Note that the CLI interface is unstable, so beware if using from within scripts.
Enabling maintenance mode...
done
Exporting apps...
              0 100%    0.00kB/s    0:00:00 (xfr#0, to-chk=0/1)
Exporting database...
Exporting config...
Exporting data...
         15.90M 100%  109.87MB/s    0:00:00 (xfr#105, to-chk=0/139)
Successfully exported /var/snap/nextcloud/common/backups/20190703-130201
Disabling maintenance mode...
done
Export complete
Compressing backup...
tar: Removing leading `/' from member names
Nextcloud backup successfully compressed to /home/ncbackup/Backups
Removing backups older than 14 days...
find: ‘./home/ncbackup/Backups/’: No such file or directory
Complete
Nextcloud backup completed successfully.
With the echo statements we put in the script, you can see at what point in the backup things failed, if they do in fact fail.
There are masses of improvements that can be added to this script, but this satisfies my needs. If you do add improvements, please let me know and I'll post an update.
Setup Duplicati
You now have a single layer of backups for Nextcloud. However, if you want to abide by the 3-2-1 rule of backups (which I highly recommend), then we now need to use Duplicati to add additional layers to our backup routine.
To install Duplicati, go to this link and right click ‘copy link location‘ on the Ubuntu DEB. Then amend the commands below as appropriate.
# Download Duplicati DEB
wget https://updates.duplicati.com/beta/duplicati_[version].deb

# Install Duplicati
sudo dpkg -i duplicati_[version].deb

# If you get a dependency error, run the following
sudo apt --fix-broken install
We now need to enable the Systemd service for Duplicati so it runs automatically on boot:
# Enable Duplicati service
sudo systemctl enable duplicati

# Start the Duplicati service
sudo systemctl start duplicati
By default the Duplicati service will only listen on localhost, so if you try to access the IP of the server from another device, you won’t get the Duplcati webGUI.
To fix this, edit the DAEMON_OPTS option within the Duplicati config to the following:
# Open Duplicati config
sudo nano /etc/default/duplicati

# Additional options that are passed to the Daemon.
DAEMON_OPTS="--webservice-interface=all"
Restart Duplicati so the config changes take affect:
sudo systemctl restart duplicatiYou should now be able to access the Duplicati web interface by going to http://server-ip:8200. You will be asked to set a password for Duplicati when you first login, make sure this is a strong one!
My server is hosted at home, and I don’t expose port 8200 to the internet. If your server is not at home, then I would strongly suggest you configure something like IP Tables, or Digital Ocean firewall, to restrict access to port 8200.
Configure Duplicati Backups
Now its time to configure our backups in Duplicati. We will configure 2 backup routines – 1 to USB and another to Backblaze B2 for off-site.
Let’s do the USB backup first. Within the Duplicati webGUI, click on the Add Backup button to the left of the screen.
This is a very straightforward process where you choose the destination (our USB drive), the source (the output from our backup script) and the schedule.
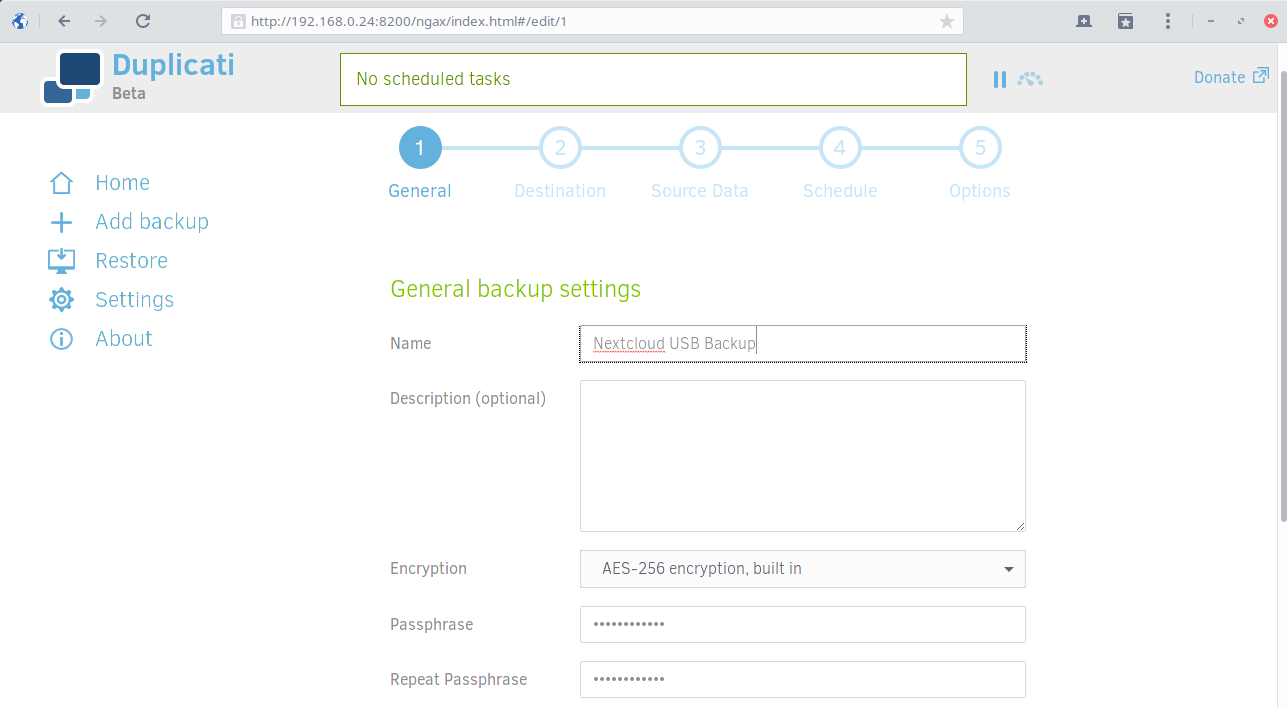
When creating your backup routines in Duplicati, always ensure you encrypt your backups and use a strong passphrase.
Also, always make sure your Duplicati backups run at different times to your other backups. Personally, I go for the following setup:
- 02:00 – Local Nextcloud backup script runs via Cron
- 03:00 – Duplicati backs up to USB
- 04:00 – Duplicati backs up to Backblaze B2
I always leave the Backblaze backup to run last, as it then has up to 22 hrs to complete the upload before the next backup starts, so they shouldn’t interfere with one another.
Off-Site Backups
When it comes to configuring your Backblaze backups, change the destination from Local to B2 Cloud Storage. You will need your B2 bucket information and application keys from to complete the config.
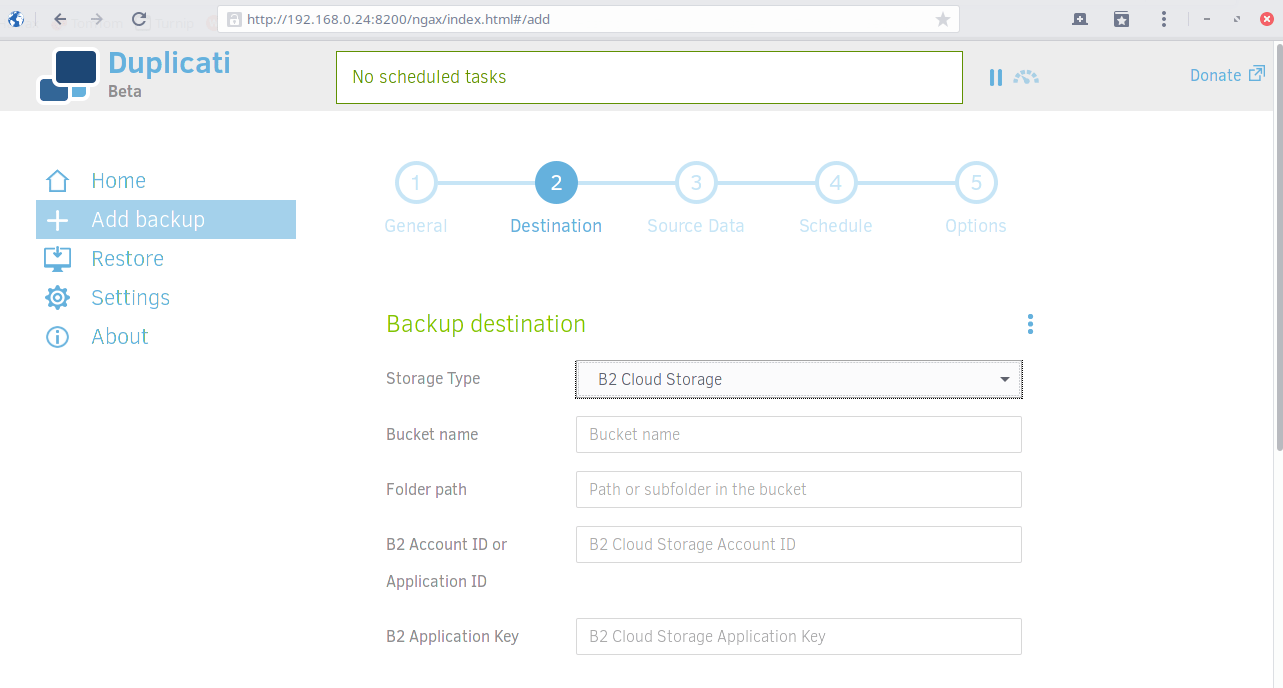
Once you have entered your Backblaze Bucket information, click Test Connection to make sure Duplicati can write to your B2 bucket correctly.
Important note: You will need to add payment information to your Backblaze account before backing up, otherwise your backups will fail.
To give you an idea of what Backblaze costs, I’m currently backing up around 150GB of data to my Buckets, and I’m charged less than $1/month.
Personally, I only keep 7 days of backups on BackBlaze, as I only have it for disaster recovery, where all my local backups have failed. I don’t need data retention in the cloud, that’s what my USB drive is for.
Duplicati Email Notifications
You can configure email notifications for Duplicati backups, this way you will always know if your backups are working.
To do this, head into the Duplicati WebGUI and click on the Settings option to the left of screen, scroll all the way down to the bottom where it says Default options. Click the option that says Edit as text, the paste the following into the field:
# Change as needed
--send-mail-url=smtp://your.smtp.server:587/?starttls=when-available
--send-mail-any-operation=true
--send-mail-subject=Duplicati %PARSEDRESULT%, %OPERATIONNAME% report for %backup-name%
--send-mail-to=your@email.com
--send-mail-username=smtp-username
--send-mail-password=smtp-password
--send-mail-from=Backup Mailer <backups@email.com>
I personally use Amazon SES for this, but you should be able to use any SMTP server.
That's It!
You’re done. That’s it. Finito. You now know how to backup Nextcloud in such a way that it abides by the cardinal 3-2-1 backup rule, and it lets you know when your backups have run.
TEST YOUR BACKUPS!
I can’t stress this enough. Once your backups have been running for a few days, make sure you run a test restore (not on your live system) to make sure you can get your data back. After all, there’s no point in having backups if you can’t restore from them!
To restore the backups you have made of Nextcloud into a vanilla Nextcloud snap installation, you need to decompress your backup to /var/snap/nextcloud/common then use the nextcloud.import command to restore it:
# Decompress your backup
tar -xvzf /path/to/nexcloud/backup.tar.gz -C /var/snap/nextcloud/common

# Restore your Nextcloud backup
sudo nextcloud.import /var/snap/nextcloud/common/backup-to-restore
Yes, restoring your Nextcloud snap from backup really is that simple!
Conclusion
This is by no means the perfect way to backup Nextcloud, but it does work and it has worked for me for quite some time now. You may have a different/better way of backing up, if you do, please leave comment below, or get in touch with me.
Finally, I’d like to thank my friend Thomas from work, who helped improve my script a little and gave me a couple of ideas to improve to the security.
Thanks, Tom. 🙂
Subscribe for more!
You don't have to keep coming back here to read my latest waffle. There's a couple of ways to subscribe to receive updates whenever I publish new content.