Making A Website - 01 The Basics
Welcome to the first post in my series Making A Website. This series of posts will take you through all the steps needed to make your very own website from scratch.
It will have multiple pages including a blog, a modern, clean design, beautiful typography and a raft of other features.
I have made a dedicated website that follows this series. It will accompany these posts, so head over to mylightwebsite.kevq.uk to check it out.
Neocities
The first thing we need is somewhere to host our website. There are literally thousands of places you can host your website, but Neocities makes it super simple.
Once you're signed up, login to your Neocities account and navigate to your dashboard. Here you should see a very basic website that Neocities automatically creates:
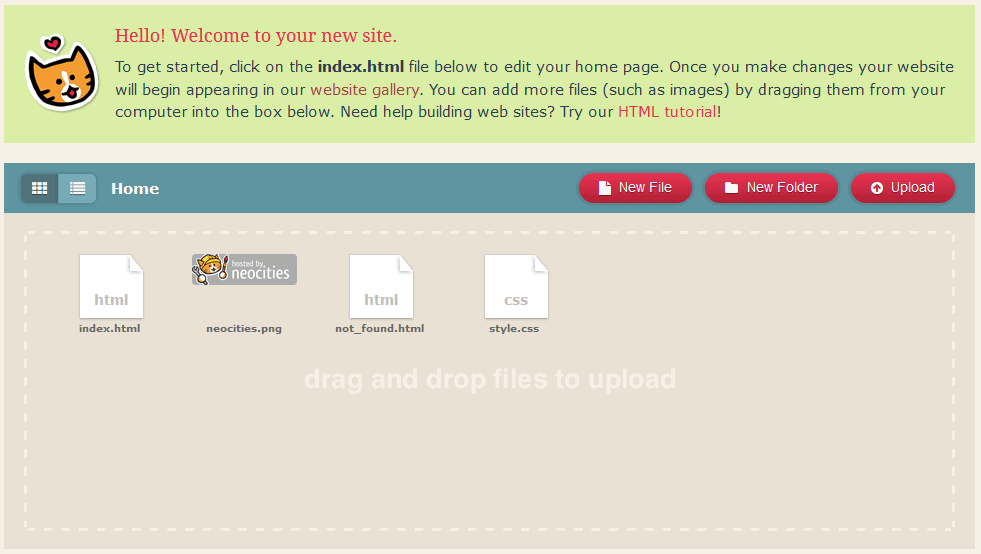
Delete all the files within the dashboard apart from index.html. This is done by hovering the mouse over each file and selecting delete.
Now click on index.html to edit it and replace all of the contents of the file with the following HTML code:
<!DOCTYPE html>
<html>
<head>
<title>mylightwebsite.kevq.uk</title>
</head>
<body>
<h1>Hello World!</h1>
<p>Welcome to the first stage of my <i>Making A Website</i> series. As you can see, this page is extremely basic ans is covered in more detail on my first blog post in the series, <a target="blank" href="/making-a-website-01-the-basics/">01 - The Basics</a>.</p>
<p>You can download the raw files for this step (and all other steps) from the <a href="/downloads.html">downloads page</a>.
<p>OK, let's move on to step 1.1, where we start looking at some basic CSS coding.</p>
<a href="step1.1.html">On To Step 1.1 --></a>
</body>
</html>
Breaking It Down
Let's break the site down to it's different parts and explain what they all are. After all, what's the point in making a website if you don't learn something new.
- The
<head>element is used to store metadata such as document title and links to stylesheets, fonts and scripts. The<head>is not displayed on the page. <title>is simply the title of the webpage. It's basically the text that's displayed within the tab on your browser.<body>is where all the fun stuff happens. This is the main bulk of the webpage that is displayed in the browser window.- The
<h>tag defines headers. These can be different sizes, starting with the biggest,<h1>to the smallest,<h6>. <p>simply means normal text and is short for paragraph.<a>is a hyperlink; it's short for address.- When you see a tag that is preceded with a forward slash, for example
</body>that depicts the end of that particular element.
For now, the only thing you need to edit is the line that starts with <title>. Replace my name with whatever you want the title of the webpage to be. The rest you can edit as you see fit. Just play around and have fun with it.
Challenge: see if you can work out how to add a bulleted list to your webpage.
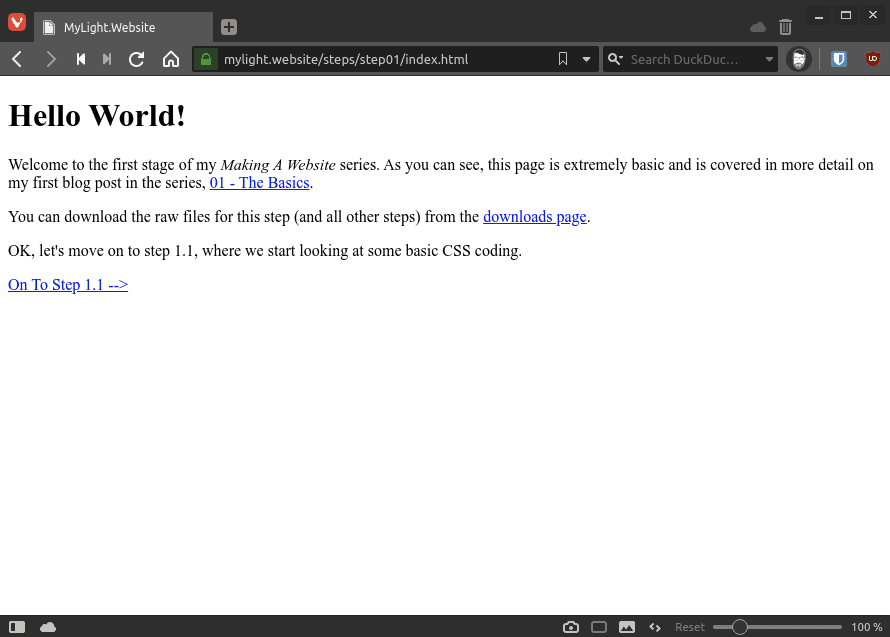
These humble beginnings will eventually grow into a pretty nice looking website. But for the time being, this is what your little website should look like:
Adding CSS
Now we have a really simple (and quite ugly) website, let's look at adding some basic CSS so we can make things look a little nicer. Return to your Neocities dashboard and create a new file called style.css.
Edit the file and add the following CSS code to it:
body {
  background: #fff;
  color: #333;
  font-family: sans-serif;
  display: block;
  text-align: left;
  width: 800px;
  margin: 0 auto;
}
This CSS, or Cascading Style Sheet, will tell your webpage how you would like the <body> element of the site to be rendered. We have picked some colours (#fff is white and #333 is dark grey), a font and also told the body to display in a block that is 700px wide.
Challenge: See if you can change the colour of hyperlinks to red.
The next step is to edit the index.html file so that we tell it to use the stylesheet we just created. We do this by adding the highlighted <link> element on line 4 to the <head> of the website:
<!DOCTYPE html>
<html>
<head>
<link href="style.css" rel="stylesheet" type="text/css" media="all">
<title>mylightwebsite.kevq.uk</title>
</head>
<body>
<h1>Hello World!</h1>
<p>Woah! Things are looking a lot different already, right?</p>
<p>We have a better looking font, and the content is now displayed in a nice block on the page.</p>
<p>We've now added a basic Cascading Style Sheet (CSS) file which has formatted the site a little to make it more appealing. <b>No <i><span style="font-family:TimesNewRoman;">Times New Roman</span></i> here!</b>
<p>Just like Step -01, This page is covered in more detail on my first blog post in the series, <a target="blank" href="/making-a-website-01-the-basics/">01 - The Basics</a>.</p>
<p>You can download the raw files for this step (and all other steps) from the <a href="/downloads.html">downloads page</a>.
<p><b>Step 02 hasn't been published yet. If you want to know when it's release, <a href="/feed">subscribe to my RSS feed</a>. Once it has been released, this page will be updated.</b></p>
<a href="/index.html">Go Back Home --></a>
</body>
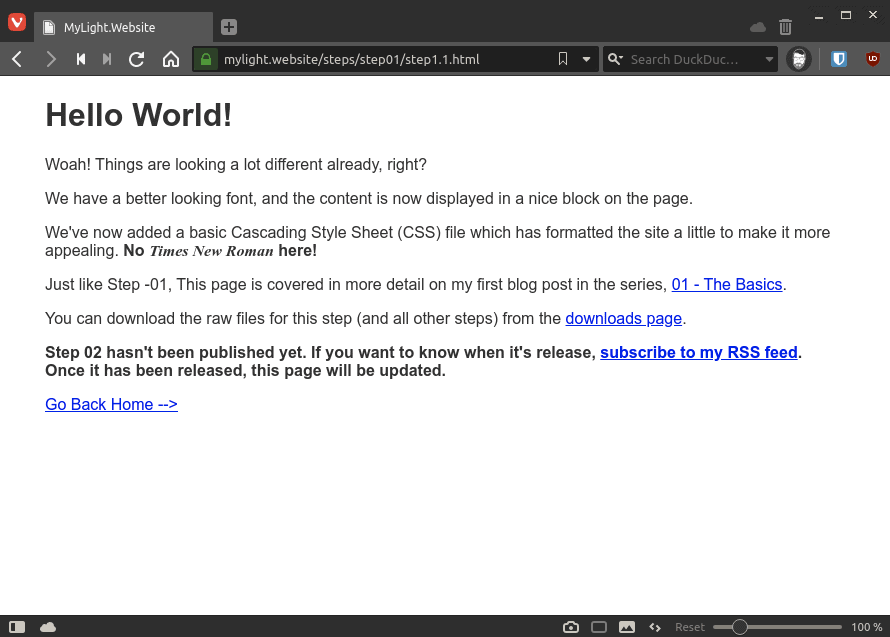
</html>Save the index.html file and reload your website. It should now look a little nicer than it did before. The font should have changed and the page's contents should be displayed in a nice block.
Get a domain (optional)
Once you're all setup using Neocities, your website address will be username.neocities.org. I personally think it's best to have a custom domain for your website, but this is totally optional. If you do decide to get a custom domain, make sure you choose the right one.
I personally use and recommend NameCheap for domain registrations. I've been with them for many years and I think they're great.
In order to use a custom domain with Namecheap, you will need to upgrade to their supporter plan.
A great start
That's it for this post. We're making good progress, but there's still a long way to go. In the next Making A Website post, we will look at the following:
- Picking a colour palette for the site
- Additional formatting with CSS
- Embedding images
If you want to download the raw files for this series, you can do so here. I will update the page after every post with latest website files.
Subscribe for more!
You don't have to keep coming back here to read my latest waffle. There's a couple of way to subscribe to receive updates whenever I publish new content.