How To Setup Pi-hole On A Synology NAS
| 6 min read
I've been using Pi-hole on my network for a few weeks now and things are going great. I'm sure you can gather than from the name, Pi-hole was originally designed to run on the Raspberry Pi.
But I don't like the idea of having something as crucial as DNS running on a RPi, so I run Pi-hole on my Synology (I have a DS218+). To get Pi-hole up and running, you could download the image, spin a container with the default settings and it will work.
However, you will end up seeing all the clients on your network bundled under a single 172.x.x.x IP address, which is the Docker gateway IP. This issue on Github talks about the problem in a little more detail.
Ad and tracker blocking will work with the default settings, but to get a true picture of what's going on with your network, you need to see all the clients separately. So I'll take you through what settings you need to tweak in order to make this happen.
Setting up Pi-hole on a Synology
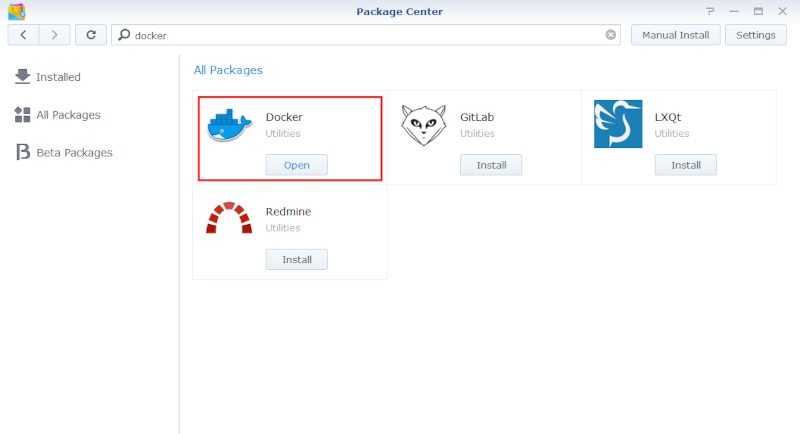
Right then, let's get to work, shall we? The first thing you're going to need to do is install the Synology Docker app. So launch the Synology Package Centre, search for docker and click on the Install button.
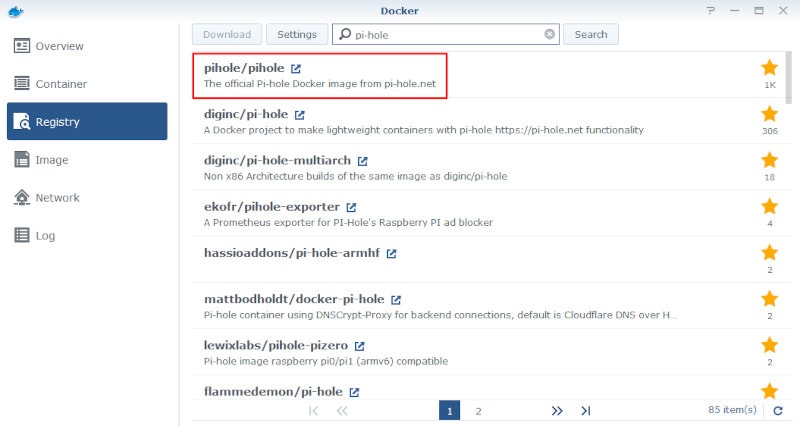
Next, launch the Docker app, click on Registry from the left-hand pane and search for pi-hole. You should see the official Pi-hole at the top of the list.
Double-click on the official Pi-hole image to download it to your Synology.
Setting up the folders
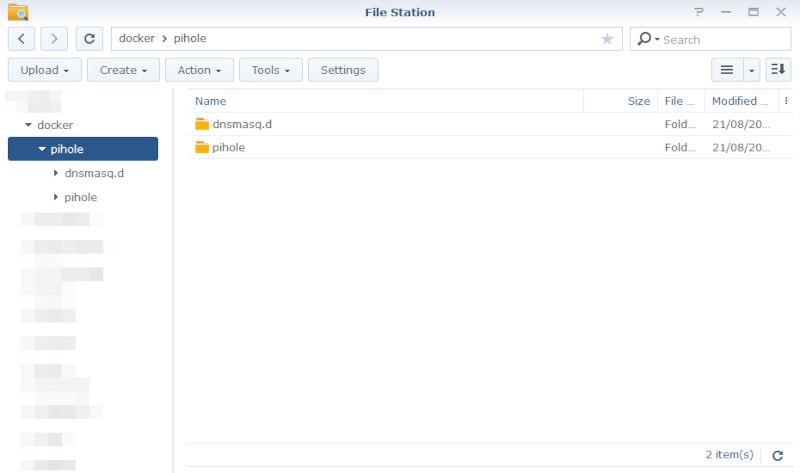
Now we need to flip to the Synology File Station app. Navigate to the Docker folder and create a new sub-folder called ****pihole.
Once you have your new pihole folder, create two more folders within it; one called pihole and another called dnsmasq.d. Once done, it should look something like this:
Configuring the Docker container
Ok then, back to the Docker app we go. We've downloaded the Pi-hole image and we now need to setup the container correctly.
Select the Images tab from the left-hand panel and double-click on the Pi-hole image you downloaded earlier. The container configuration wizard should now launch.
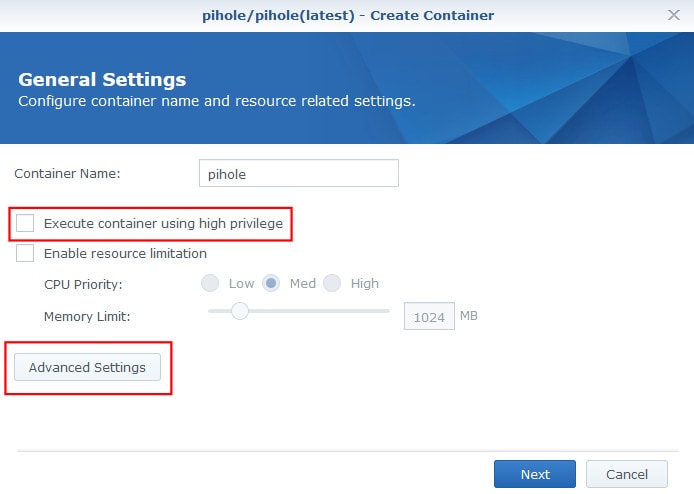
In the first step, give the container a name; I personally went with PiHole, but you can use whatever makes sense to you. Leave Execute container using high privilege unchecked, then click on the Advanced Settings button.
Once in Advanced Settings, check the box the Enable auto-restart. This will ensure Pi-hole restarts if you ever need to reboot your Synology.
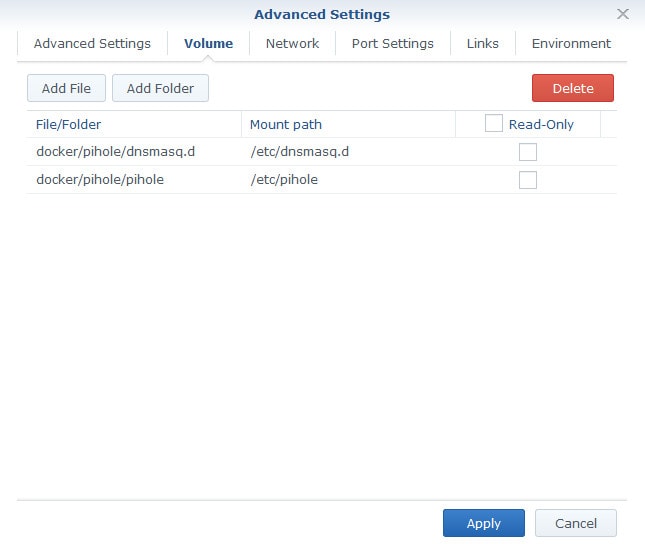
Next, go to the Volume tab and add the two folders you created earlier, mapping them to the following directories:
| Folder | Mount Path |
| docker/pihole/dnsmasq.d | /etc/dnsmasq.d |
| docker/pihole/pihole | /etc/pihole |
Once you're done adding the folder mappings, it should look like this:
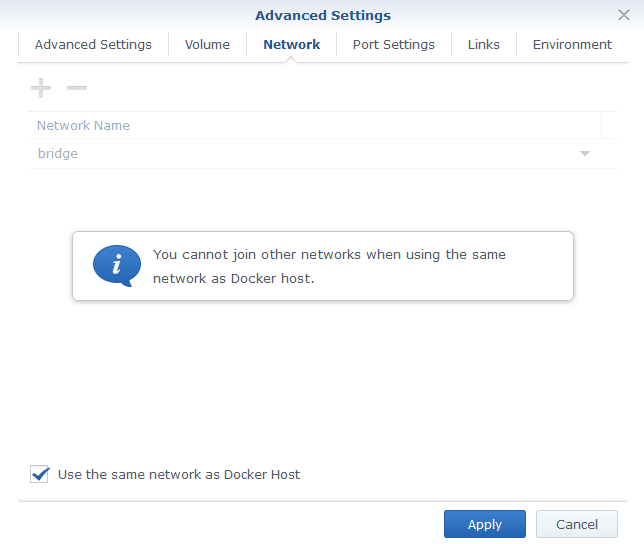
Next, go to the Network tab and enable the option to Use the same network as Docker Host.
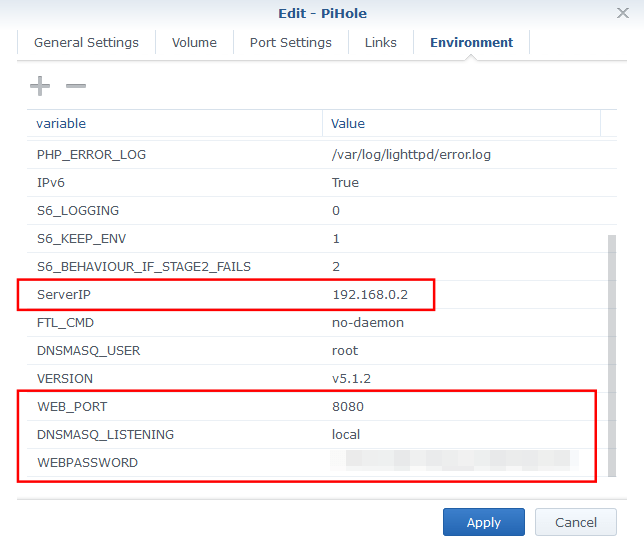
The final step is to go to the Environment tab so we can add/change a few environment variables. There are three variables we need to add, and one we need to edit.
Let's start with the new variables first:
| Variable | Value |
| WEBPASSWORD | [your_pi-hole_password] |
| DNSMASQ_LISTENING | local |
| WEB_PORT | 8080 |
For the WEBPASSWORD variable, set this to whatever you want the Pi-hole login password to be. For WEB_PORT use any port you have available, 8080 should work for most people.
Next we need to edit the ServerIP variable. The default value is 0.0.0.0. You need to change this to your Synology's internal IP address. For me, this is 192.168.0.2.
Finally, click on the Apply button and start your shiny new Pi-hole container.
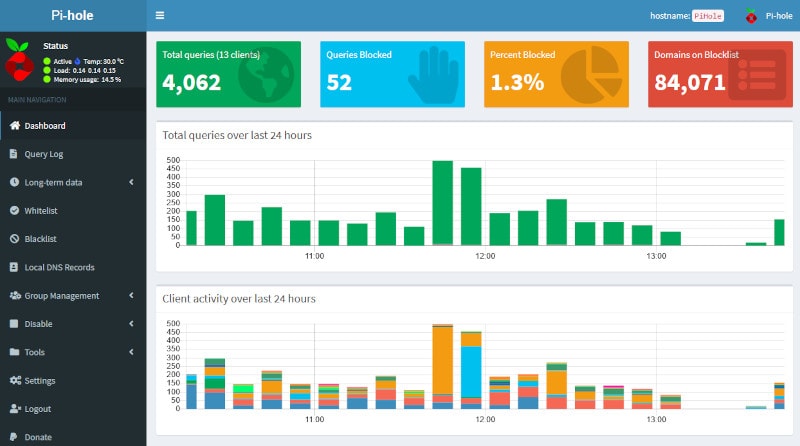
Once it's up and running, you should be able to navigate to http://<synology-ip>:<pi-hole-port>/admin (for me this would be http://192.168.0.2:8080/admin) to access Pi-hole.
Note: This will only be accessible on your local network. I wouldn't recommend exposing Pi-hole to the Internet.
To login, use the password you created when you added the WEBPASSWORD environment variable. You should now see a dashboard similar to this:
Next steps
Now you have Pi-hole up and running on your Synology, you will need to change the DNS settings on your router so that DNS points to your Pi-hole and not your router.
This process all depends on which router you have. So find the DNS/DHCP settings on your router and change the primary DNS server to the IP address of your Synology.
I would also recommend setting the secondary DNS as your router, or a service like Quad 9. So you will still be able to resolve DNS queries if Pi-hole goes down.
Once your client machines start getting new DHCP leases from your router, the DNS changes should take place and you will see the client numbers grow within Pi-hole. To speed up this process, disconnect and reconnect any devices from the network.
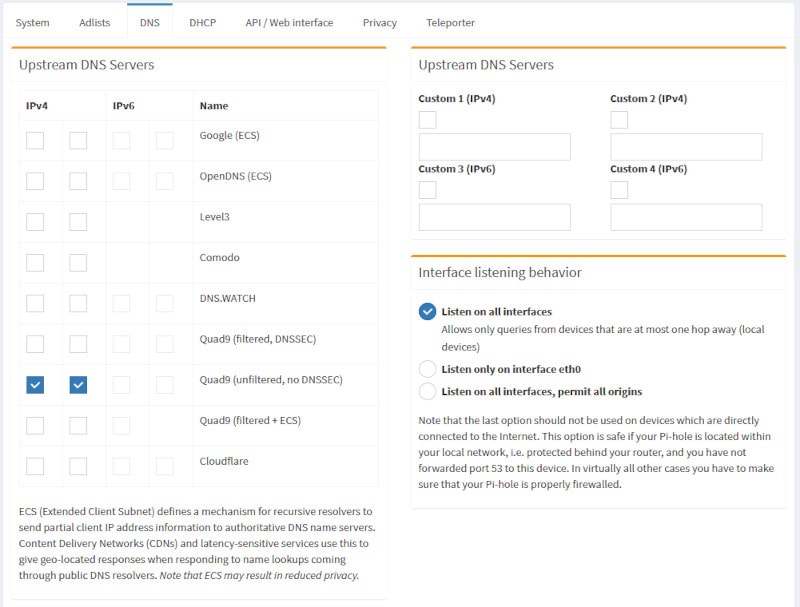
Finally, I'd recommend changing the default public DNS servers that Pi-hole uses. Pi-hole uses Google DNS by default and since I'm a de-Googled kinda guy, I don't like this. Instead I set them to Quad 9.
You can do this by going to Settings > DNS:
Conclusion
You should now be setup with Pi-hole on your Synology NAS. No more ads, no more tracking, and no more ISP monitoring of your DNS. Pretty cool, huh?
In terms of performance impact on your Synology, there will be very little. On my network, the Pi-hole container uses around 30MB of RAM and the CPU usage doesn't even register. So even if you have a fairly low powered Synology, you should still be fine.
Hosting Pi-hole on the Synology is much more robust than on the Raspberry Pi. While the Pi is great for hacking on, it's not the right kind of hardware to be used as a server in my opinion.
Finally I'd like to quickly add that if you get use out of your Pi-hole instance, please remember to throw the project a donation. It will really help support this great project and keep it alive.
Subscribe for more!
You don't have to keep coming back here to read my latest waffle. There's a couple of ways to subscribe to receive updates whenever I publish new content.