How To Host Email With Your Own Domain
| 8 min read
A while ago I wrote a post on why you should own your own domain. In that post I explained that hosting email with your own domain allows you to keep control of your email. In this post I'm going to show you how to setup email with your own domain using the same company I use to host my email, Zoho.
Why Zoho?
There are many email providers out there, you can even self-host if you're that way inclined. So why am I recommending Zoho over all the other providers out there?
Firstly, Zoho's service is extremely good. I've been using them on and off for around 4 years now and their service has always been problem free. Secondly, their premium mail service is very cheap, at around $1 (80p) per month for 5GB or mail storage. Finally, their privacy policy is pretty clear:
Zoho has never sold your information to someone else for advertising, or made money by showing you other people's ads, and we never will. Zoho Privacy Policy
Email with your own domain
The first thing you're going to need is a domain for the email to go with. If you already have a domain name, feel free to skip this part. However, if you don't, I would recommend Namecheap as they're cheap and offer free privacy protection on all their domains.
Once you have your domain registered, it's time to flip over to Zoho to register for an account. In this example I'm going to use a spare domain I have, gistt.uk.
The first step is to make sure you setup catch-all email forwarding to your current email address within the Namecheap dashboard. This will allow you to receive email to your new domain while we setup your new domain with Zoho.

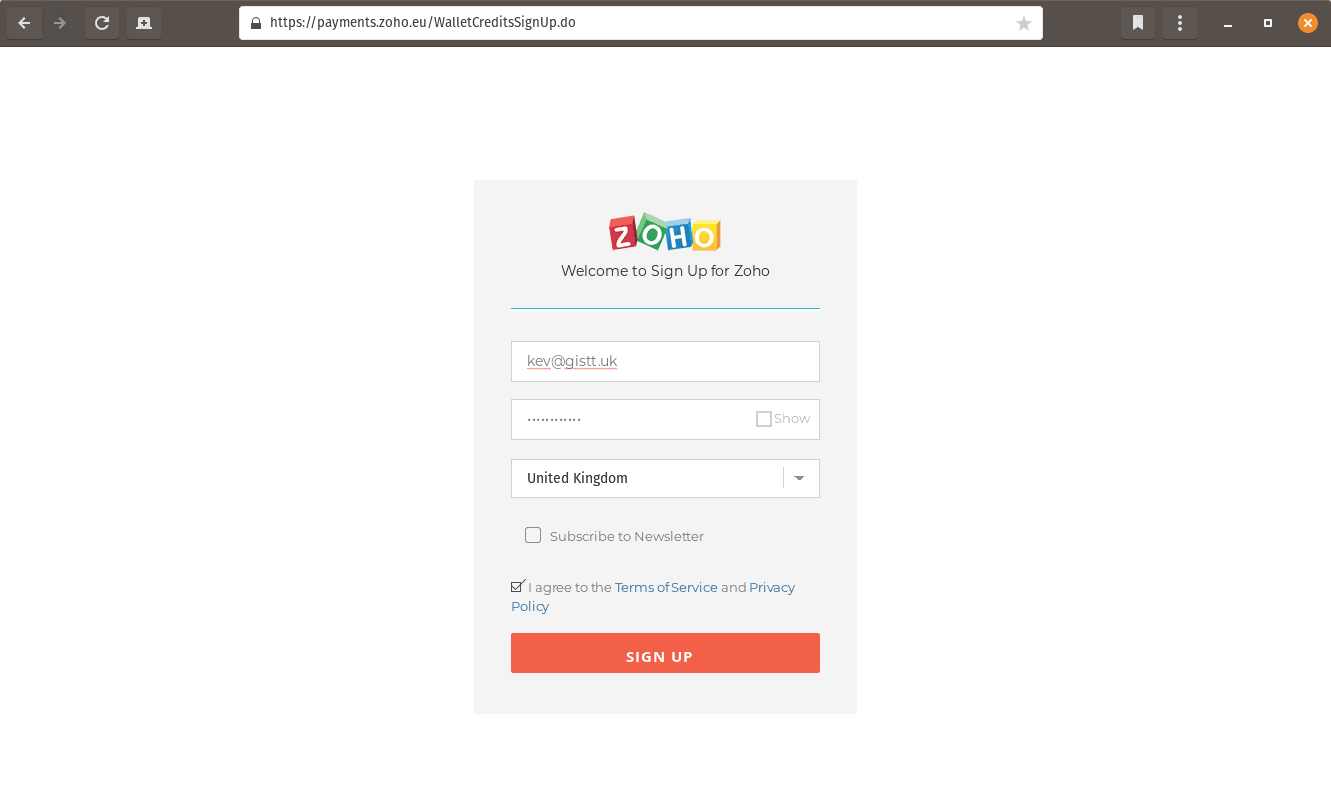
Now we're ready to head to Zoho to sign up for an account; you can use the button below. Once you're on the Zoho sign up page, fill in your custom email etc.
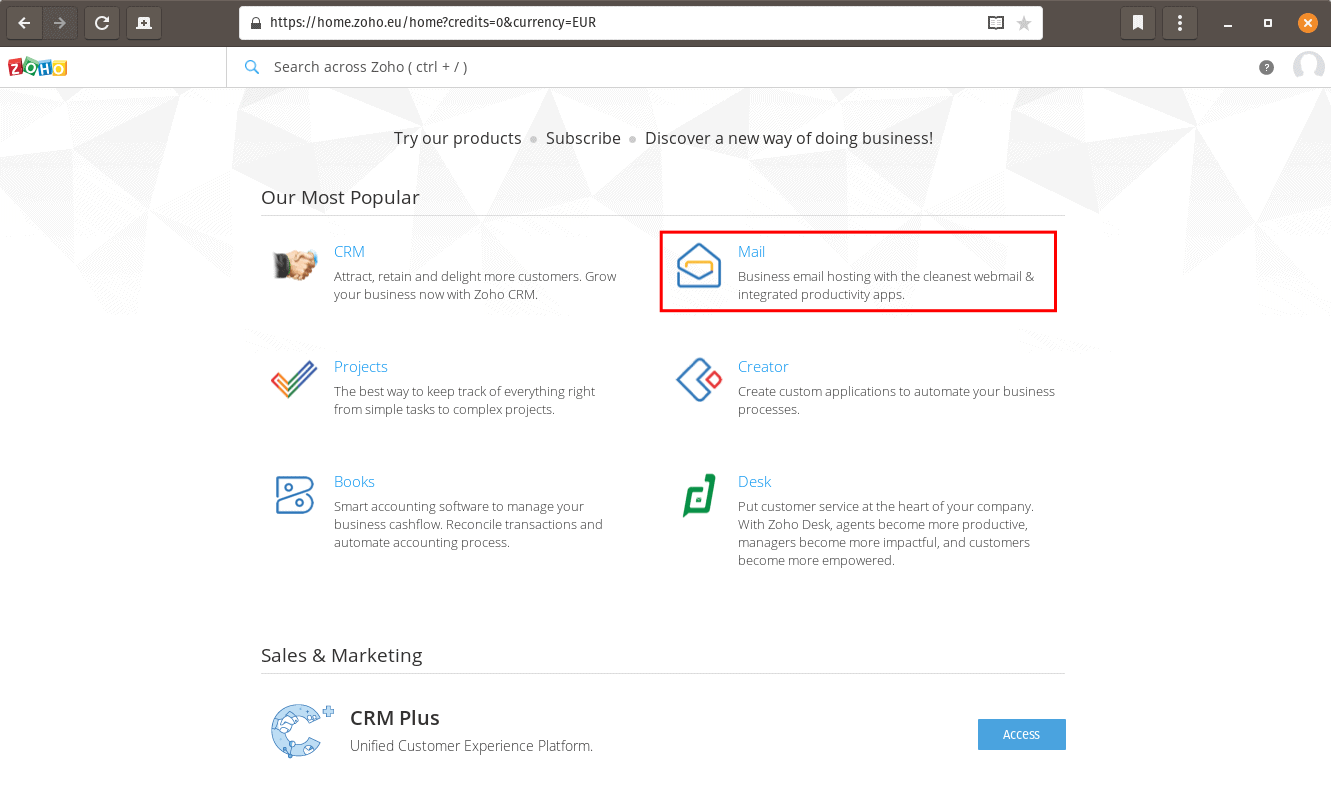
Once you hit the sign up button, click on the Mail link to get started setting your mailbox up.
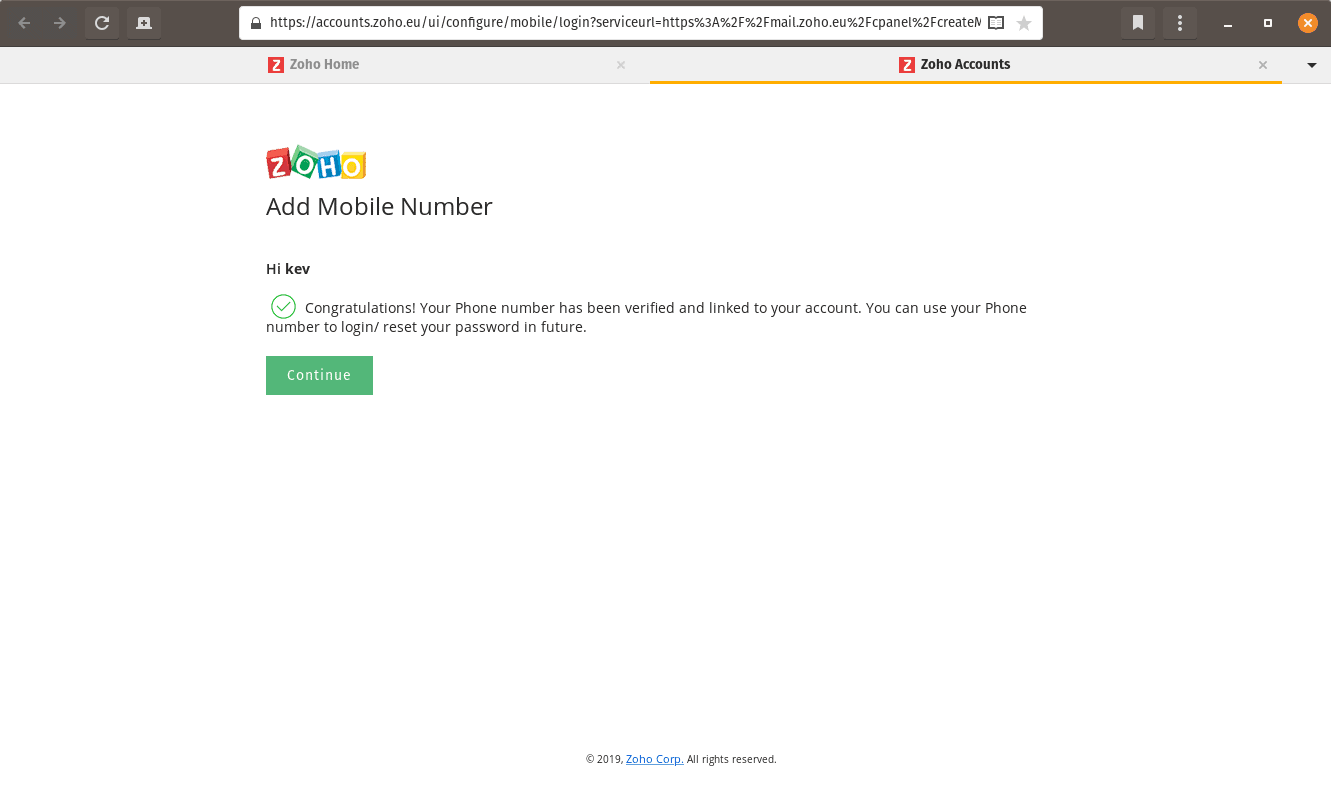
Zoho will now ask you for a mobile phone number. This is for security purposes apparently. I'm not clear why the mobile phone number is required, but I've never received a call or text from Zoho other than for verification purposes. This can be used later for 2 factor authentication via SMS, but I wouldn't recommend this. Instead, I'd recommend a 2FA app, like Authy or Google Authenticator.
Configure Your Emails
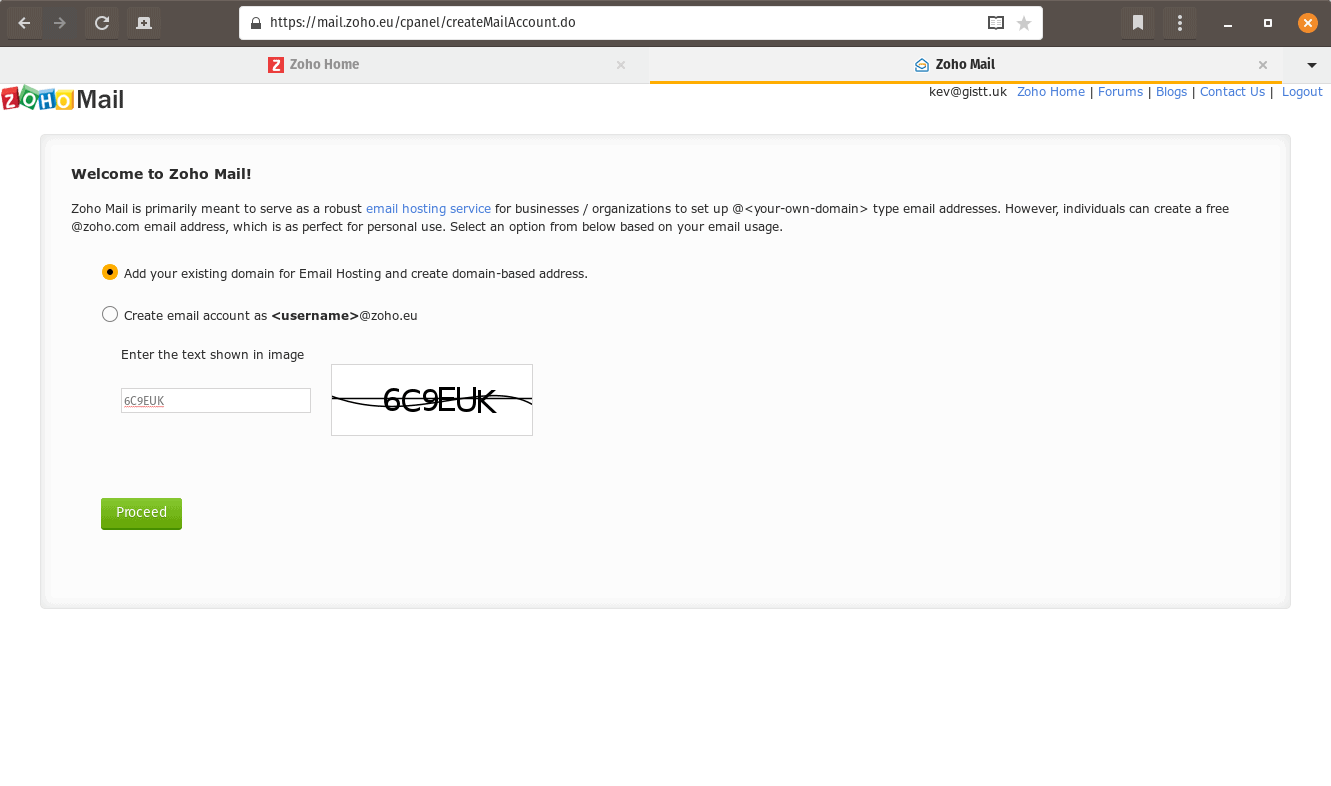
That's us all signed up for Zoho mail, so now we can get on with configuring our email and domain so we can start receiving email. Once you have clicked Continue after verifying your phone number, select the option that says “Add your existing domain...” as well as the CAPTCHA text.
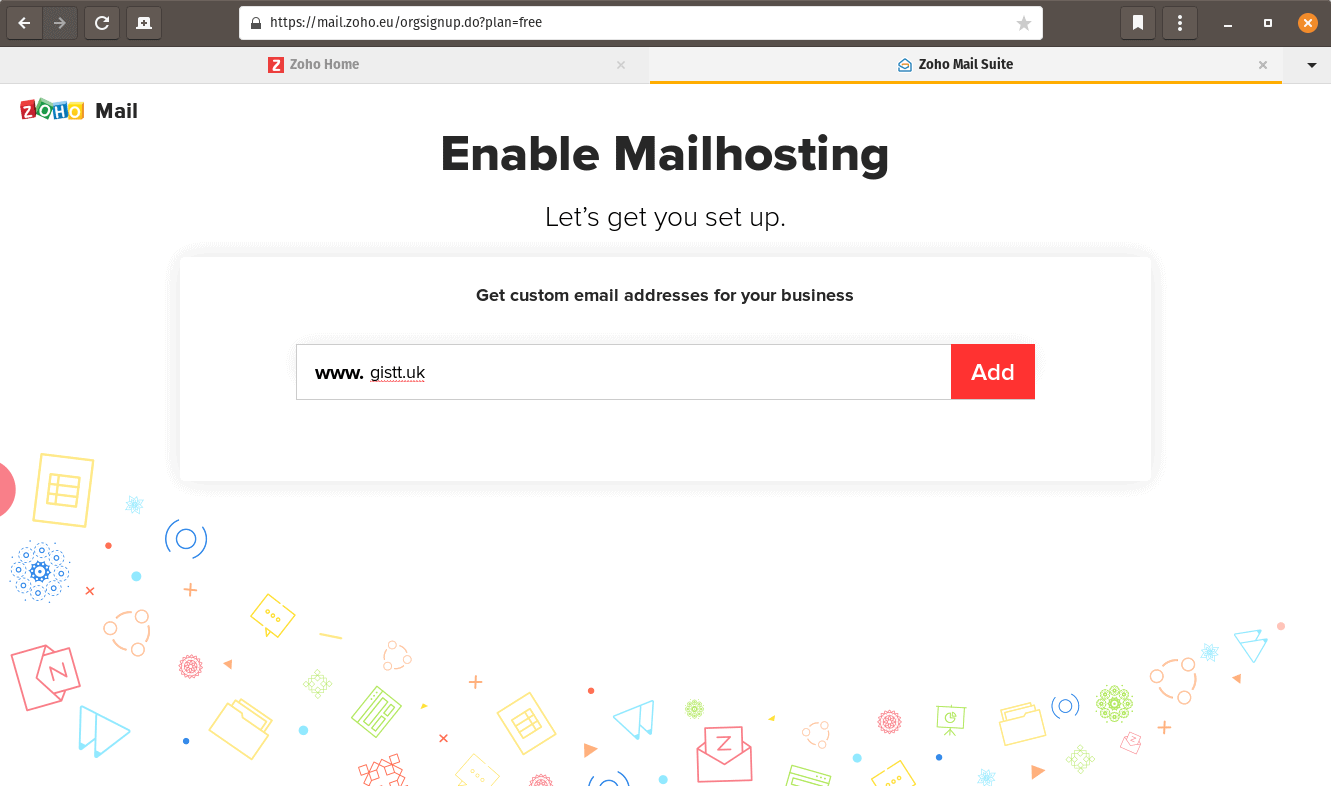
Once you have clicked Proceed, add your domain and click Add.
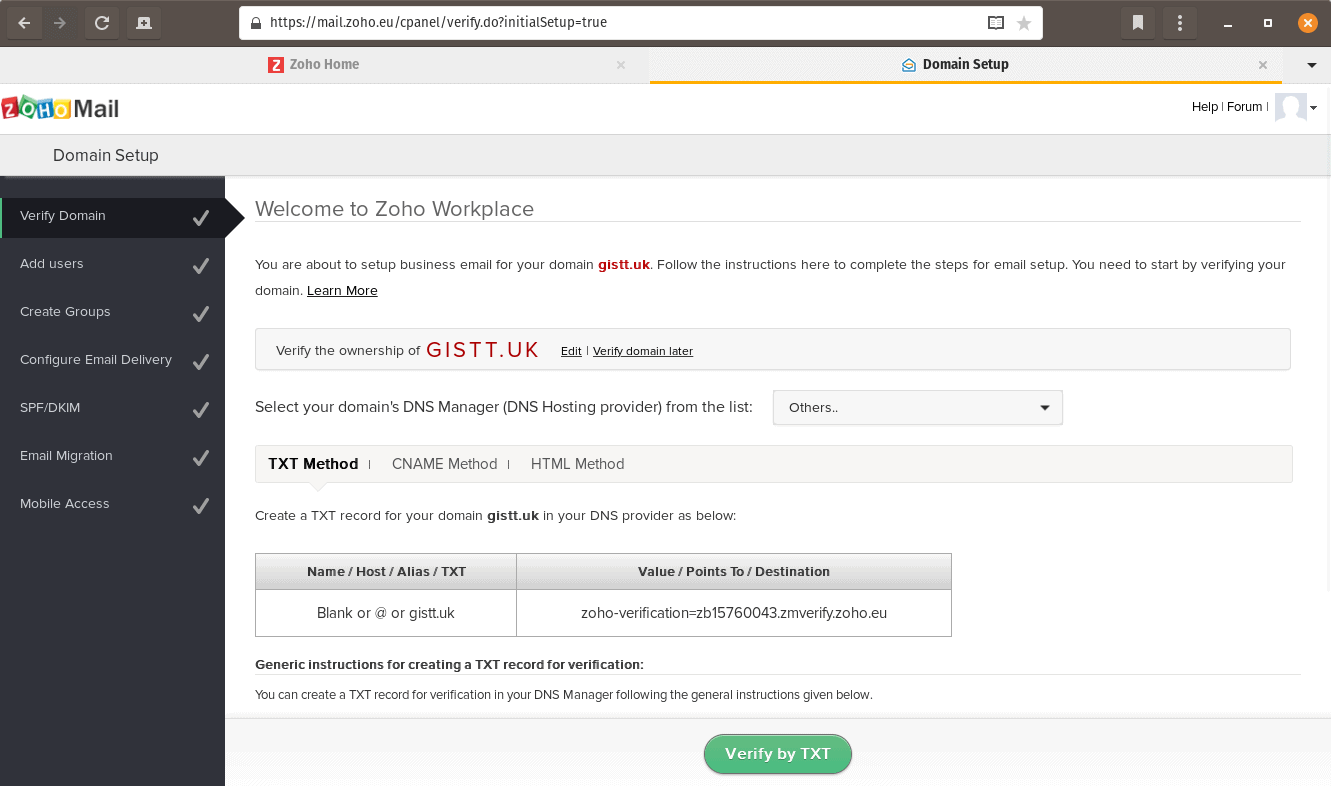
It's now time to prove that you own the domain you're trying to sign up with. From the drop-down menu where it says Choose, select Others.. as your domain hosting provider.
Make sure TXT Method is selected in the popup and head over to Namecheap.
Once you're in the Namecheap dashboard, click on your domain then select the Advanced DNS menu. Once in Advanced DNS, select the Add New Record button.
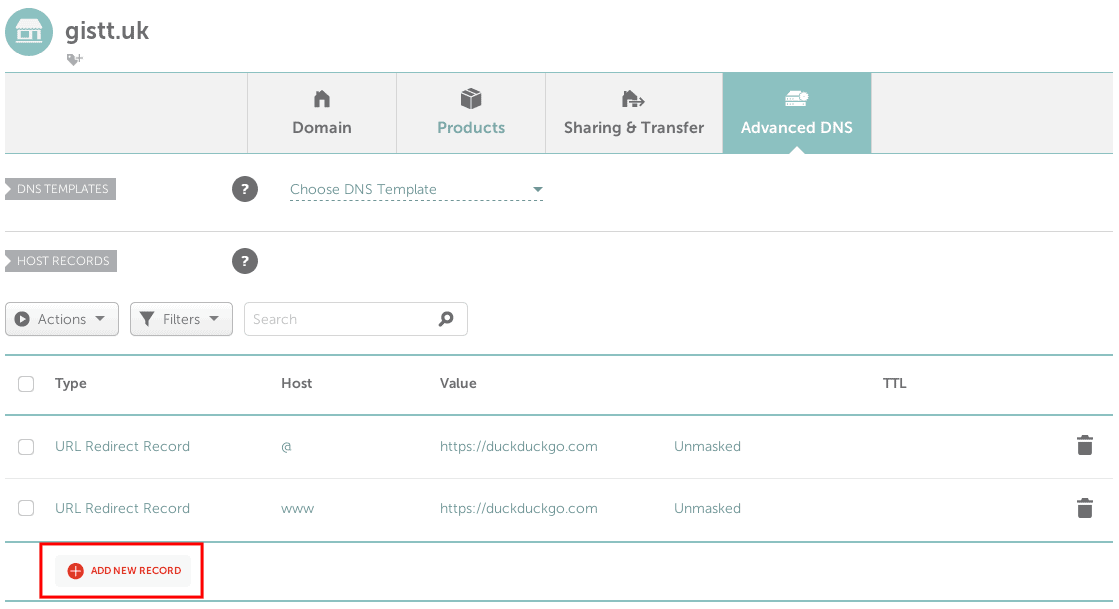
Now change the record type to TXT and copy/paste the details from the Zoho verification window. Once filled in, click the green tick to verify the new TXT record.

Back in the Zoho verification window, click on the green Verify by TXT button. Zoho will now attempt to verify your new TXT record. Don't worry if this fails, DNS records take some time to propagate around the Internet. Eventually the verification will work, just keep trying.
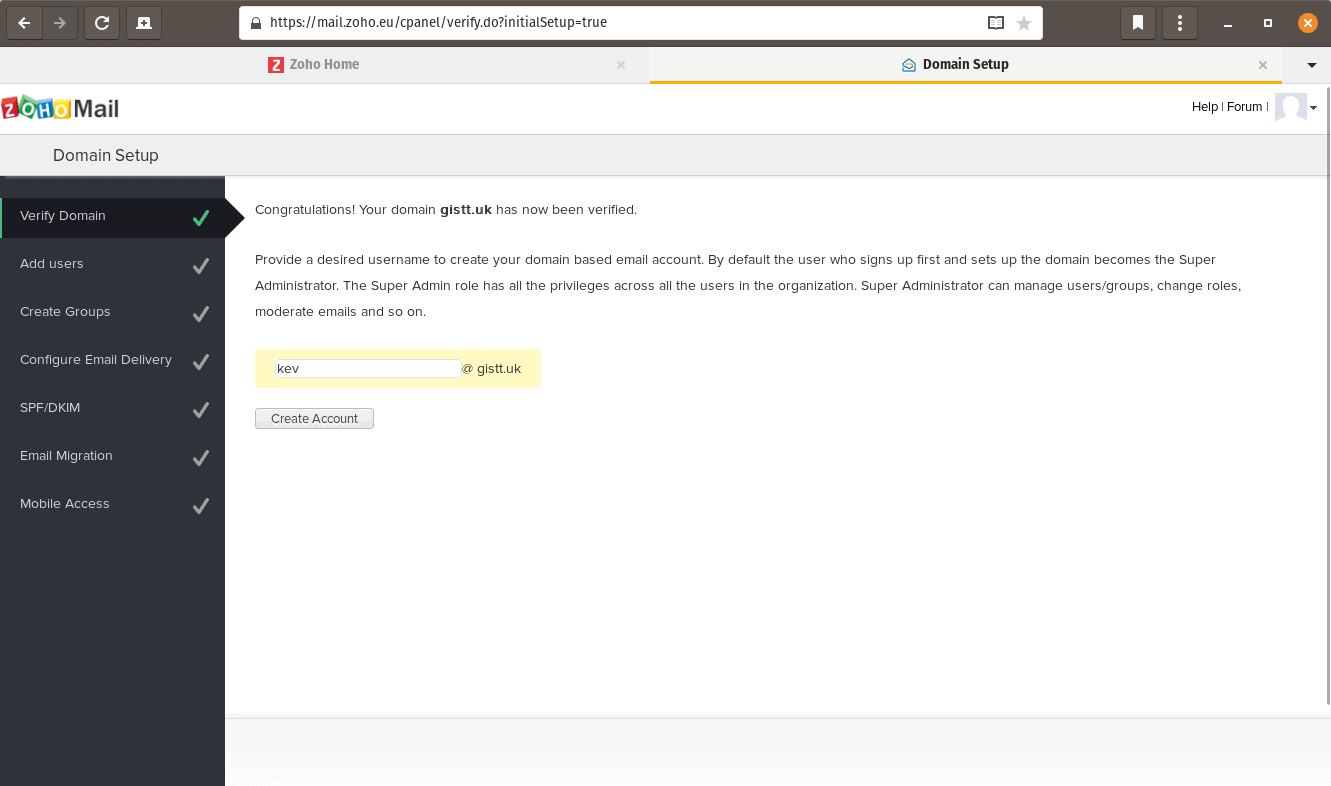
Once your domain is verified, Zoho will ask you to setup your first account. For this example, we will use kev@gistt.uk.
Add Users & Groups
If you have other users or groups to setup, you can do this now. This isn't necessary though, as you can add additional accounts later. So we're going to skip Add users and Create groups.
Configure Email Delivery
Next we need to configure email delivery so that new mail is delivered to Zoho when someone sends us an email. This is done with MX records within the Namecheap Advanced DNS dashboard.
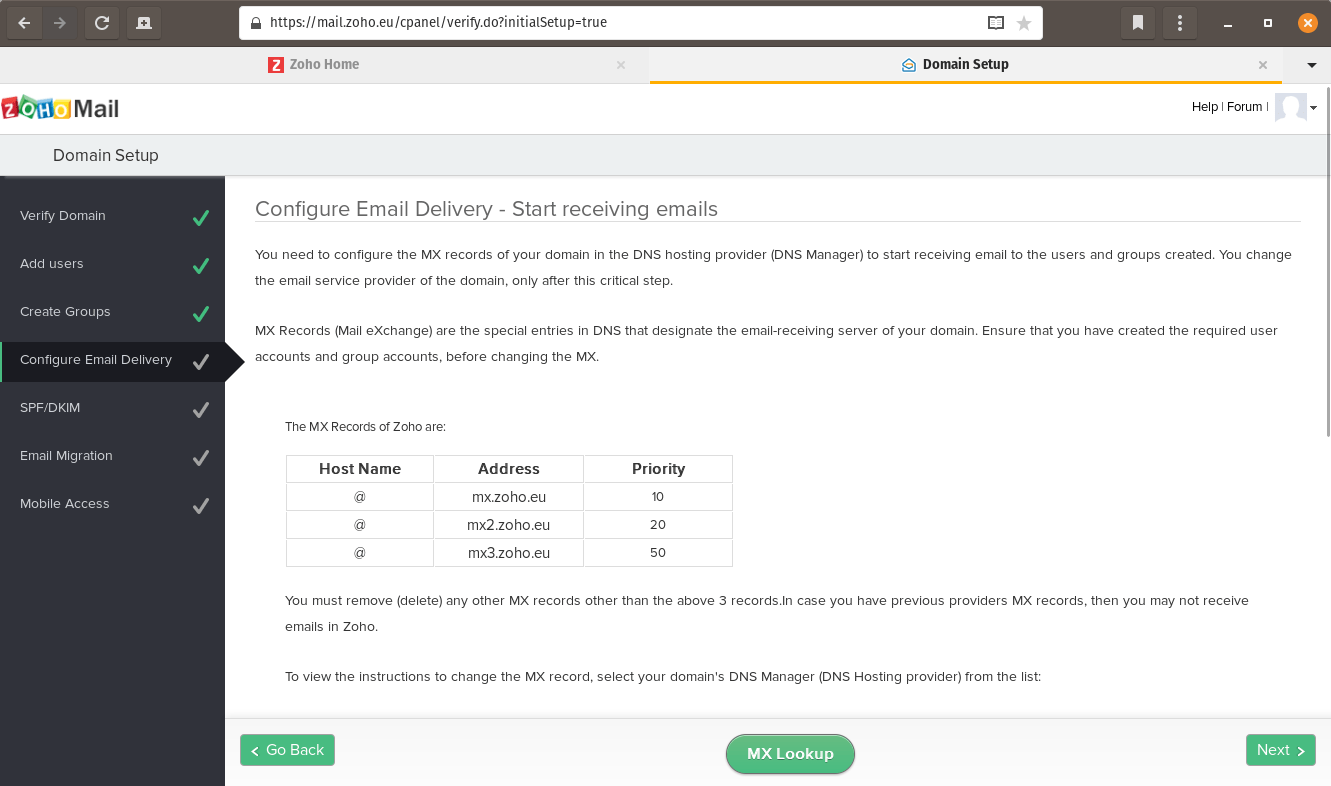
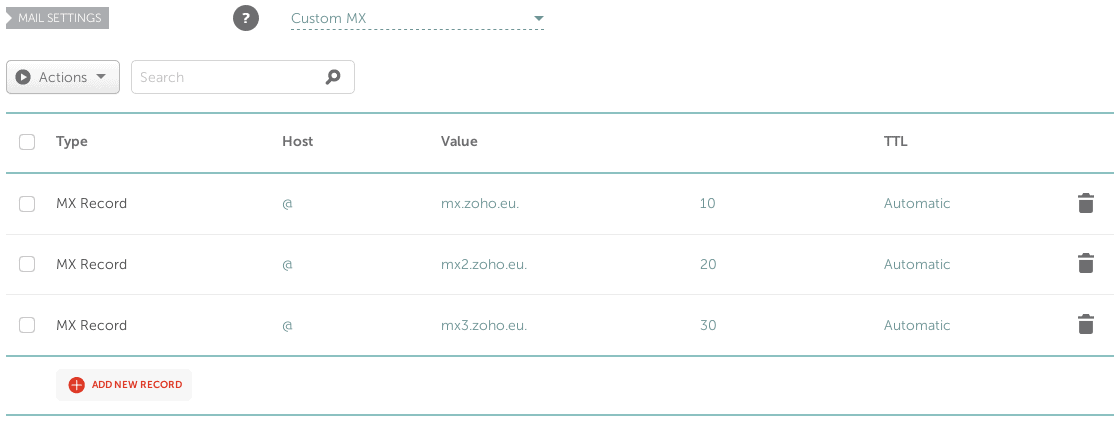
This time, head to the Mail Settings section within Namecheap's Advanced DNS editor and change the drop-down value to Custom MX. Then simply create new MX records that mirror those shown in the Zoho setup wizard.
SPF / DKIM
Next we need to configure the SPF and DKIM records. These records will ensure that when you send emails from Zoho, your emails will hit the recipient's inbox rather than their spam folder.
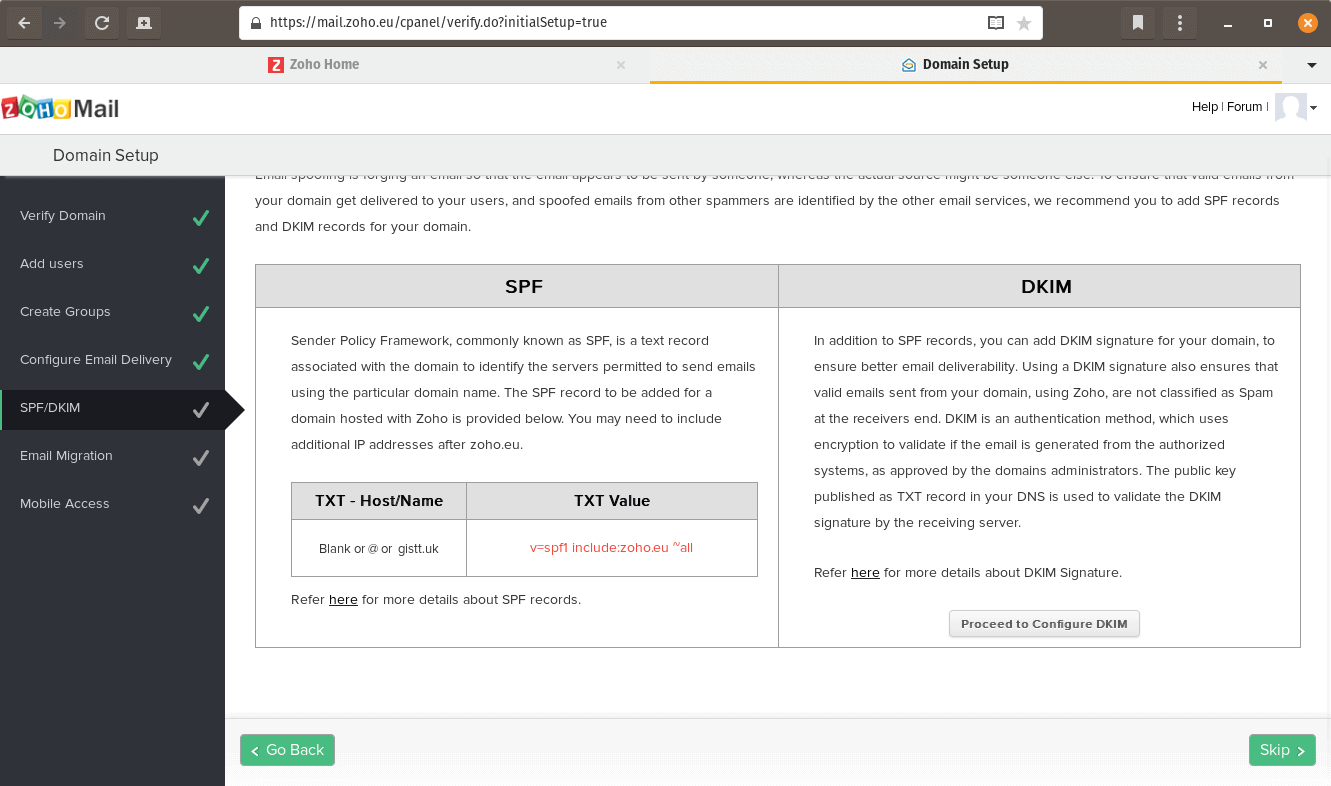
The SPF Record is just another TXT Record. So head back to your Namecheap Advanced DNS window and add a new TXT record, again copying the details within the Zoho setup wizard.

Once the SPF record is configured within Namecheap, head back to Zoho and click on the Proceed to Configure DKIM button. Then, next to the domain you're setting up, click on the pencil icon under Action to edit your domain's DKIM.
Once in the edit window, click on the + Add Selector link and set the selector name to zoho and click Save.
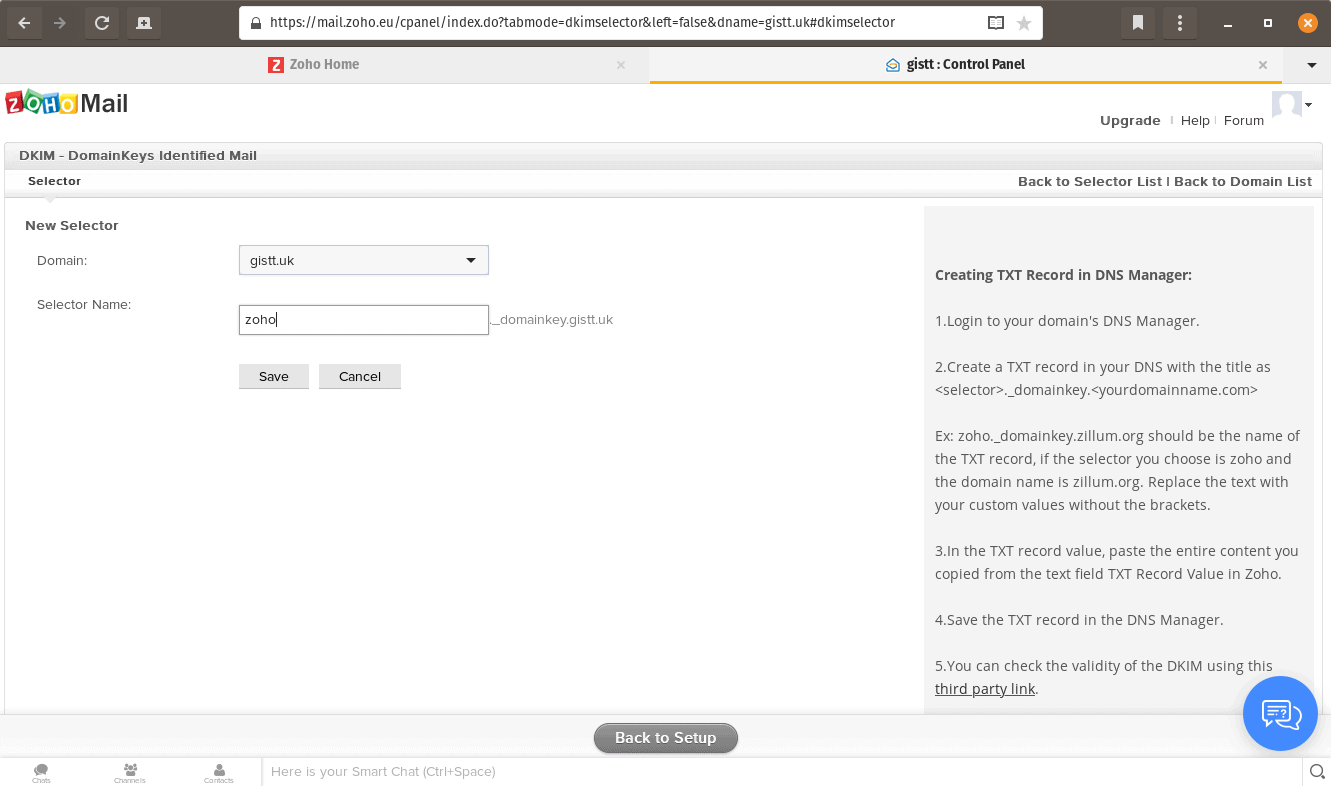
You will then see the newly generated DKIM record. Once again, this is configured as a TXT Record within Namecheap. So let's head back there to set it up:

Make sure the host field for the DKIM TXT record is set to zoho._domainkey then copy/paste the entire TXT value in. Once that's done, click on the Verify button.
Once verification is done, click on the Back to setup button so we can finish off the Zoho setup process.
Final Steps
At this point, your new email should all be setup and working. If you have email you wish to migrate over to Zoho, you can do so by following these instructions. If you don't have email to migrate, you can skip this step.
The final step is to configure mobile access and Zoho will show you some of their mobile apps. Personally, I use the Zoho Mail app on my iPhone as it syncs my mail, contacts and calendars easily. If you prefer to use native apps, Zoho supports POP/IMAP, Exchange ActiveSync and Cal/CardDAV protocols for syncing. You can get more info on mobile sync using this help article.
Once you have finished going through the Zoho setup wizard, click on the Go to Zoho Workplace button, then click on the Mail button to be taken to your new Zoho Mailbox.
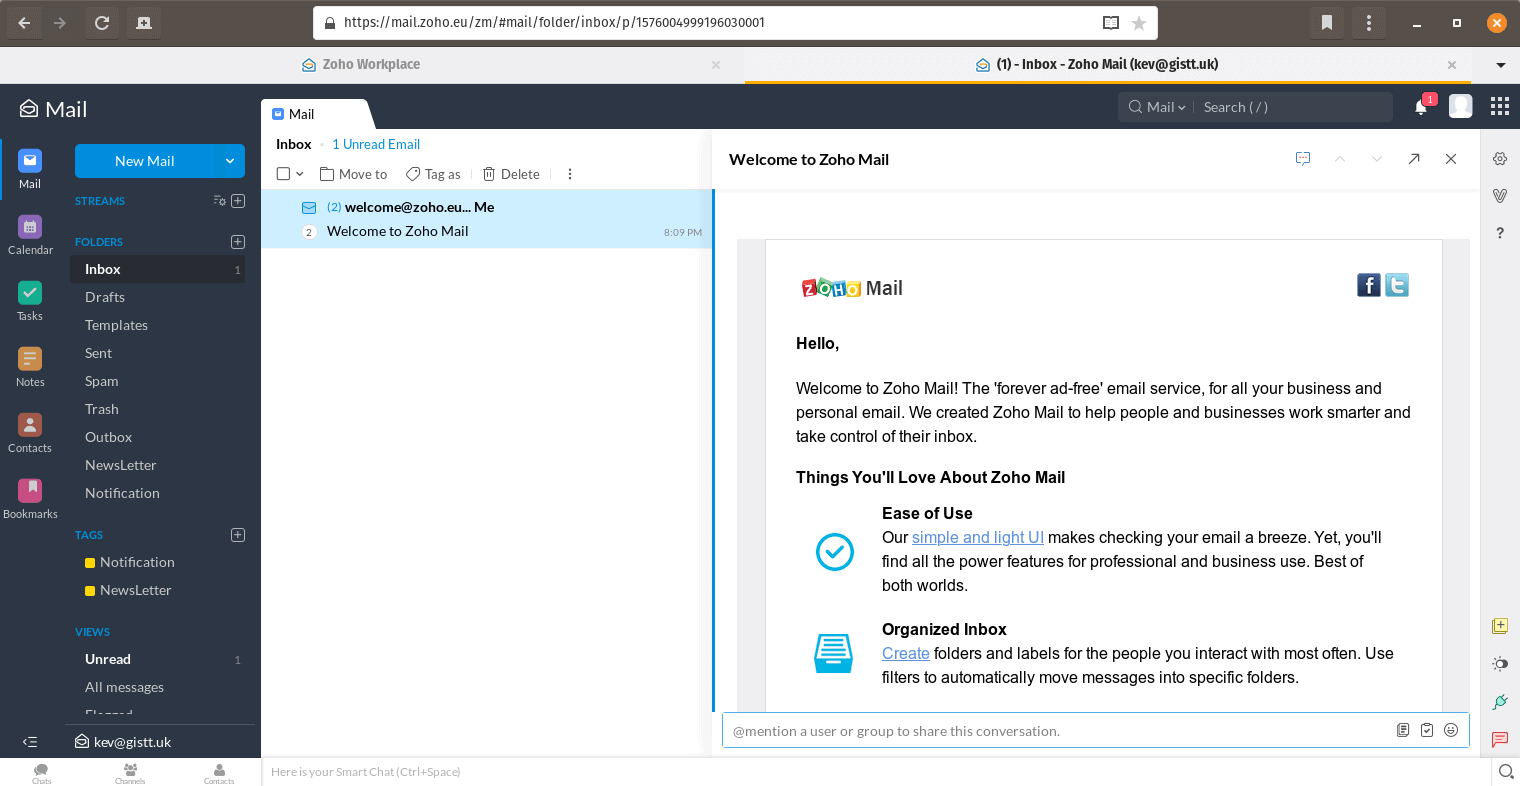
That's it!
You now have your new mailbox setup with Zoho and you will be able to send/receive mail on your very own domain.
By default, you will be on the Zoho Mail Free plan, which gives you 5GB of storage and up to 5 users for free forever, however there's no mobile sync on the free plan and you can only use one domain. To upgrade to a paid subscription, click on your avatar from within your mailbox and click on the red Upgrade button.
As well as mail, contacts and calendars, Zoho Workspace also gives you access to a number of other services, such as Zoho Docs, where you can store/edit documents online.
Conclusion
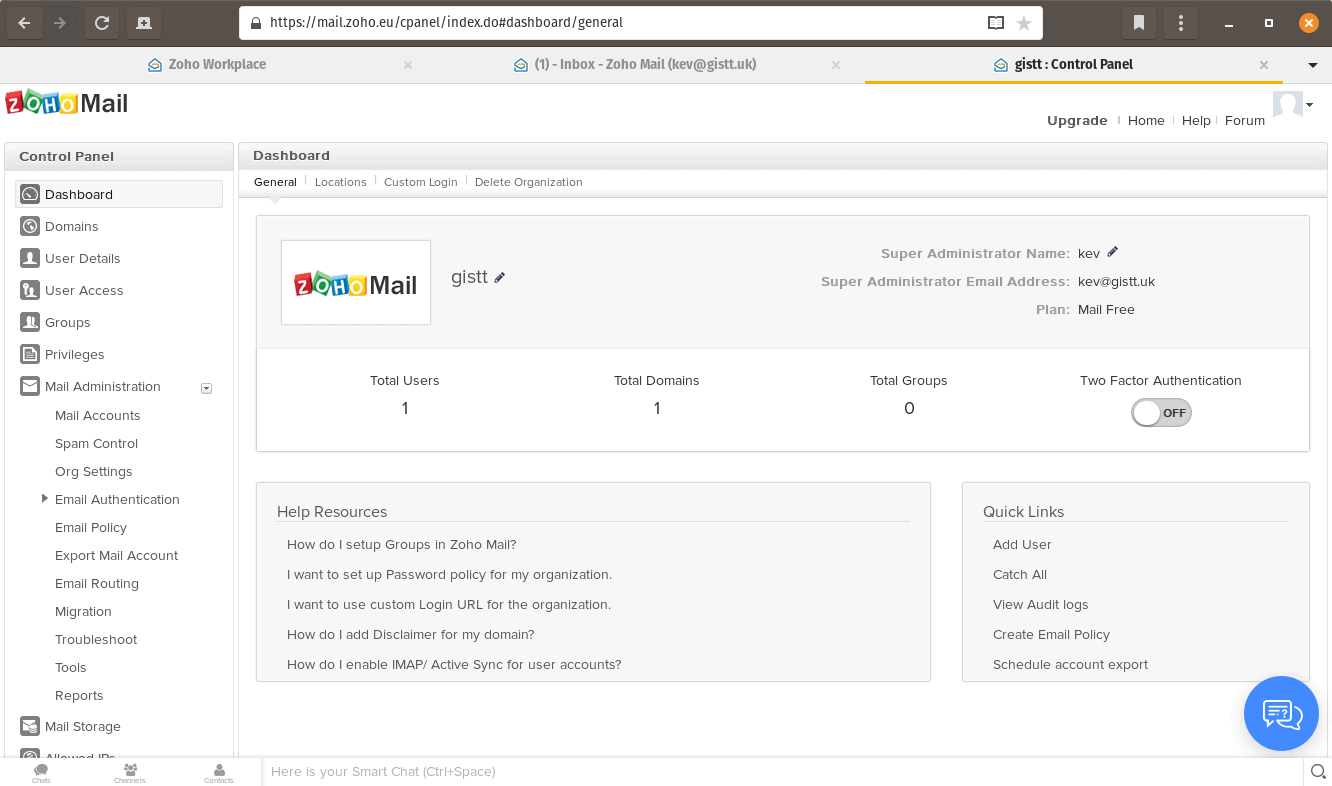
From the Zoho control panel you can then add additional users, groups and domains if you so wish. You can also manage things like 2 factor authentication and email aliases. You can even whitelabel the UI with your own logo if you wish.
Just go exploring and see what Zoho has to offer - the options are very verbose.
I personally think that Zoho Mail is a superb service that works well, respects your privacy and is competitively priced. Hopefully you will now be able to send and receive email with your domain.
Subscribe for more!
You don't have to keep coming back here to read my latest waffle. There's a couple of ways to subscribe to receive updates whenever I publish new content.